Tag Archives: pink

Stripey Pedi plus Help!

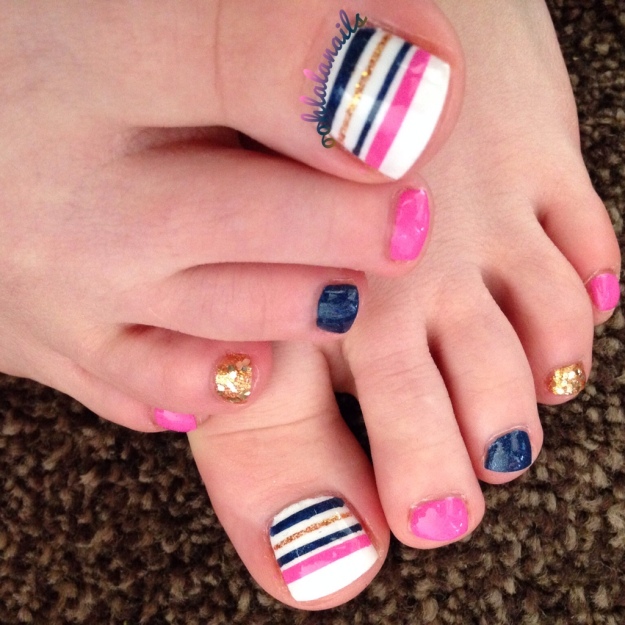
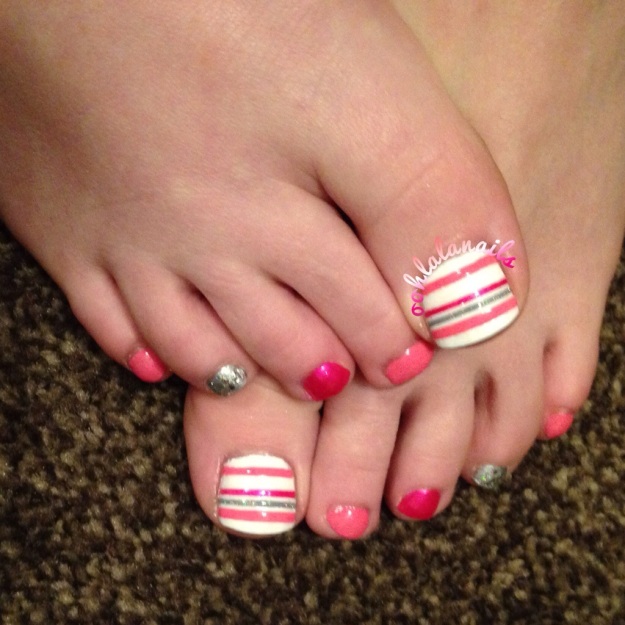
Hey lovelies how are you all? I’ve got two stripey pedis to show you today. I currently have a thing for stripes!

20140509-062923.jpg

20140509-062931.jpg
I love how you can make it different with just a few colour changes!

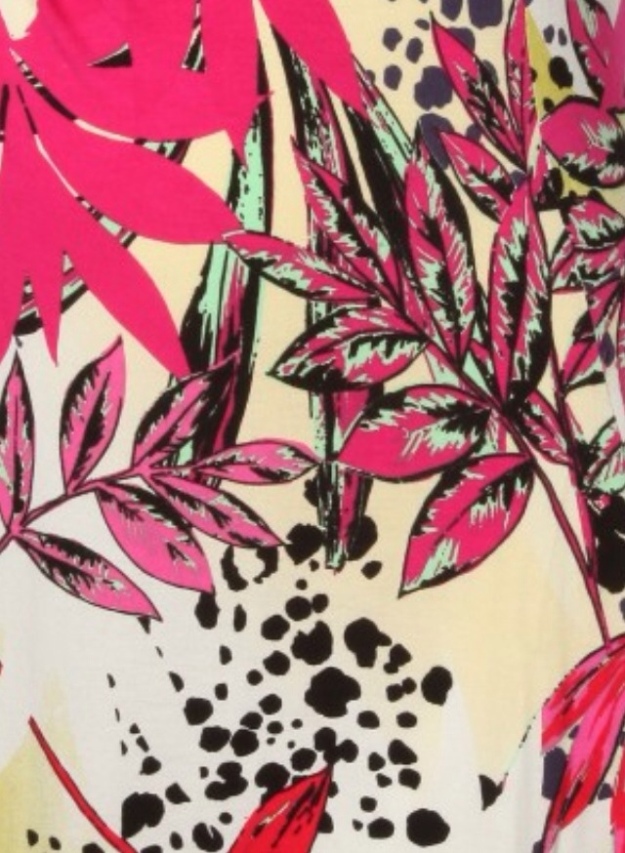
Now I have a question for you ladies! I need your help with some nail art! I have a new dress and it’s a bit of a big deal because it’s an actual nursing dress (which are so hard to come by and pricey here!) This is the pattern:

20140509-063105.jpg Can any of you amazing ladies help me decide how to paint my nails to match my dress?

Hope to hear from you all soon! Xo

After Christmas Nails

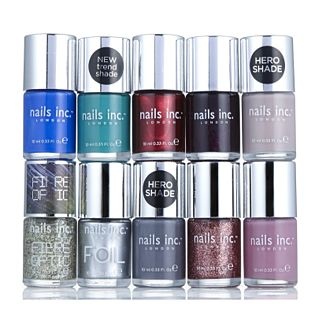
Hi lovelies, hope you all had a very Merry Christmas and Santa delivered everything you dreamed of! I was a lucky ducky and had some nail varnish! My gorgeous fella got me the Nails Inc Top 10 Collection

20131227-021015.jpg The colours included are:
❤ Baker Street – cobalt blue
❤ Queen Victoria Street – emerald green
❤ The Boltons – deep red metallic
❤ Crown Court – deep purple metallic
❤ Porchester Square – classic nude
❤ Chelsea Passage – gold fibre optic
❤ South Kensington – silver foil effect
❤ The Thames – cool grey
❤ Chelsea Square – rose glitter
❤ Bruton Street – antique rose cream

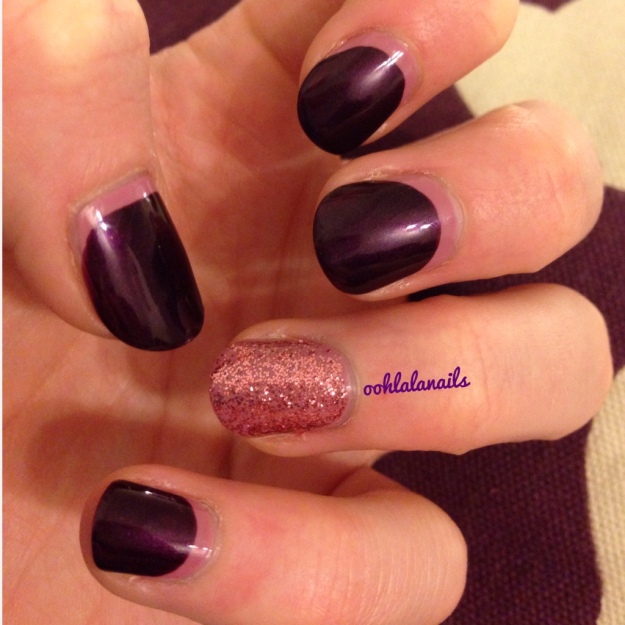
I painted a ruffian mani today using:
❤ Bruton street
❤ Crown Court
❤ Chelsea Square
❤ Seche Vite

20131227-021727.jpg

20131227-021736.jpg

The colours are gorgeous and my nails are much shinier than the picture shows. Thank you Santa!

What do you think? Did you have any polish from Father Christmas?

Cling Film Pedi

I stumbled across a new blog today and was immediately inspired to try out a new nail technique. Kelly, over at Getting Girly with Konad, did a white and pink “Saran Wrap” mani. Now after a little research I found that “Saran Wrap” is cling film here in the UK! I was in love with the white/pink colour combo so decided to stick with that for this pedi. So I painted my base, two coats of Barry M white and Seche. Then I waited a good 20 minutes for it all to dry. Then I painted Opi Pink Flamenco and quickly used my cling film to dab off the polish. Then I painted a light glitter topper and Seche to complete my pedi.

20130830-230534.jpg

20130830-230540.jpg
I love how simple this is and how it looks different on every nail depending on how hard/how many times you press the cling film down. It would be easy to make an old mani look new again by using this technique over dry polish. It looks sort of like I could graffiti on my nails now, such a super easy nail art technique. What do you think?

Oh mon dieu its the rather awesome 31 day challenge -Day 9 Textured

Hi girlies and welcome to my day 9 entry for the Oh mon dieu its the rather awesome 31 day challenge! Today I went with my Zoya pixie dust.
20130709-062349.jpg20130709-062354.jpg
I love both of these polishes, the colours are beautiful and I think the sparkle on them is great!20130709-064553.jpg

Oh mon dieu its the rather awesome 31 day challenge -Day 1 Pink

Hi girlies welcome to my day 1 entry for the Oh mon dieu its the rather awesome 31 day challenge! I went with my neon Models Own Artstix pink for this pedi because I am loving bright neon colours at the moment! To mix it up I went with a dotty tip (you know I’m dot mad recently!) in various shades; lychee, pink, black and white.

20130703-065635.jpg

20130703-065640.jpg

I quite fancy some more neon colours for neon day. But I’m trying not to buy anymore at the moment!

20130703-065652.jpg

Models Own Artstix

Hi girlies, I have a Models Own Artstix mani for you today and I absolutely love it!

I purchased this at the same time that I got my Revlon Moon Candy polish. It’s quite a fluorescent shade of pink! The glitter is beautiful; hexagons, squares, circles of all sizes and I spotted lots of colours like gold, silver and a bronze coloured tone.

20130614-223329.jpg

I painted two coats of the base colour and painted the glitter on top of my 3 alternate fingers – it only really took one coat of the glitter. This is one of the best glitters I have tried, as it went on really well with only 3 strokes over my nail. Then I used my Barry M Black Nail Art Pen to dot a border design on my remaining naked nails.

20130615-073138.jpg

Although it’s really bright for my fair skin tone, I love it! It is such a lively, shiny summery colour and the glitter is great for coverage too.

I think I will try more of these Artstix! Do you like it?

Multi Nails Inc. Watercolour/Animal Print

Hi all, boy have I impressed myself with this nail design!

I saw Jacqui’s Watercolour Nail Art Tutorial over on her blog Crafty Nail and decided to give it a go.

I followed Jacqui’s tutorial and chose 6 Nails Inc. colours for my watercolours.

20130525-012635.jpg I also wanted to do a little design with my Barry M nail art pen over the top of my watercolour.

As Jacqui says, this method is easy peasy lemon squeezy! You literally paint a white base coat, wait for it to dry, then put your coloured blobs on your nail in any position. The next step is to lay your plastic bag over your nail and press lightly to spread the colours out.
This was a few of my plastic bags after I had laid them on top of my polish blobs.

20130525-012901.jpg

When you remove the bag, the effect reminds me of water marbling but it is a quicker and easier method!

20130525-013713.jpg
Once I had my watercolour toes, I wanted to add a little something and it had pained me to remove my animal print pedi, so I decided to do a similar design as last time but over the top of my multi watercolour nails. So I did a mixture of leopard and tiger stripes over the top. This is how they turned out:

20130525-013634.jpg
I am so impressed with the overall result! I absolutely love this design! It’s so bright, summery and unique; every nail is different. This is a new favourite technique of mine – thanks Jacqui!

20130525-014247.jpg

Zoya Pixie Dust

Hello beauties, the other day I was scrolling through my reader and I came across some amazing gradient nails by Nicole at Polish Me Please. I absolutely fell in love with them-the colours looked beautiful, gradient looked fab and I loved the sparkle! I read on and found out they were textured too! They were done using Zoya Pixie Dust (what a cute name!) and I had seen lots of posts about it but I had never owned a Zoya polish. So I had to get me some Zoya Pixie Dust and recreate Nicole’s fab gradient!

20130524-090606.jpg
So my Liberty and Miranda Pixie Dust polish arrived and I had to start straight away! I followed Nicole’s instructions and sponged the gradient as she did and this is how mine turned out…

20130524-090655.jpg

Mine are not a patch on Nicole’s, because my gradient isn’t smooth enough, but I love them! I’ve never worn a textured polish without topcoat for longer than swatch photos before, I did wear Opi’s What Wizardry is This? but didn’t realise it was textured so I top coated it! The tips of my nails feel rough like they would catch on clothes and things, any tips from my fellow bloggers about wearing textured polishes?

Thanks for the inspiration Nicole :)

P.S. it’s link up Friday so link your nail blogs by clicking below. Great way to meet new bloggers.

3D Floral/Safari

Hello fellow nailoholics! I finally got around to trying the 3D flowers that I purchased from Born Pretty Store.

20130516-195435.jpg

I chose to use one of my teal Nails Inc. polishes as my background. I used my nail art pens to draw a blossom design on my thumb and stuck my 3D flower on using clear nail polish.

I realise now that thinking clear polish would be enough to stick the flower to my nail was a big mistake! I picked up some papers at work today and a sheet slid between my flower and the nail and the 3D flower came clean off :( I have now invested in brush on nail glue (why I never had any in the first place is a mystery!) so I will post a new image of the next 3D experiment soon!

On another naily note, I did a safari manicure on my friend Sarah too.

20130516-195817.jpg

What do you think?